How Do I Prepare My House for Real Estate Photos?
Getting your house ready for real estate photos is essential to making a great first impression on potential buyers. A well-prepped home looks more inviting, spacious, and appealing in listing photos, increasing the chances of selling faster and at a higher price.
At Focus Photo, we understand that real estate photos are the first look buyers get at your property. High-quality images can draw in serious buyers, while cluttered, poorly lit pictures can push them away. Staging your home correctly ensures it looks its absolute best, making it easier to attract attention in a competitive market.
Key Takeaways:
- Decluttering and deep cleaning are crucial for making your home look more spacious and inviting.
- Proper lighting enhances the warmth and openness of a space, making it more appealing.
- Staging each room helps buyers visualize the home’s potential.
- Curb appeal plays a big role in making a strong first impression.
- Hiding personal items makes it easier for buyers to picture themselves living in the space.
Interior Preparation
1. Declutter and Organize
Clutter makes rooms look smaller and less appealing. Here’s how to tidy up efficiently:
- Remove excess furniture to create open spaces.
- Clear off countertops in the kitchen and bathroom.
- Organize shelves, closets, and cabinets.
- Hide personal items like family photos, pet bowls, and kids’ toys.
- Store away unnecessary paperwork and mail.
2. Deep Clean Every Room
A spotless home looks more inviting in photos. Focus on:
- Dusting and wiping down all surfaces, including baseboards and fixtures.
- Vacuuming carpets and mopping floors.
- Cleaning windows and mirrors to maximize natural light.
- Scrubbing kitchens and bathrooms to ensure they shine.
3. Set the Right Lighting
Lighting makes a significant impact on how a space looks in photos:
- Open curtains and blinds to let in natural light.
- Turn on all interior lights to brighten up each room.
- Replace burnt-out or dim bulbs with bright, white-light options.
4. Staging Key Areas
Each room should be staged to highlight its best features.
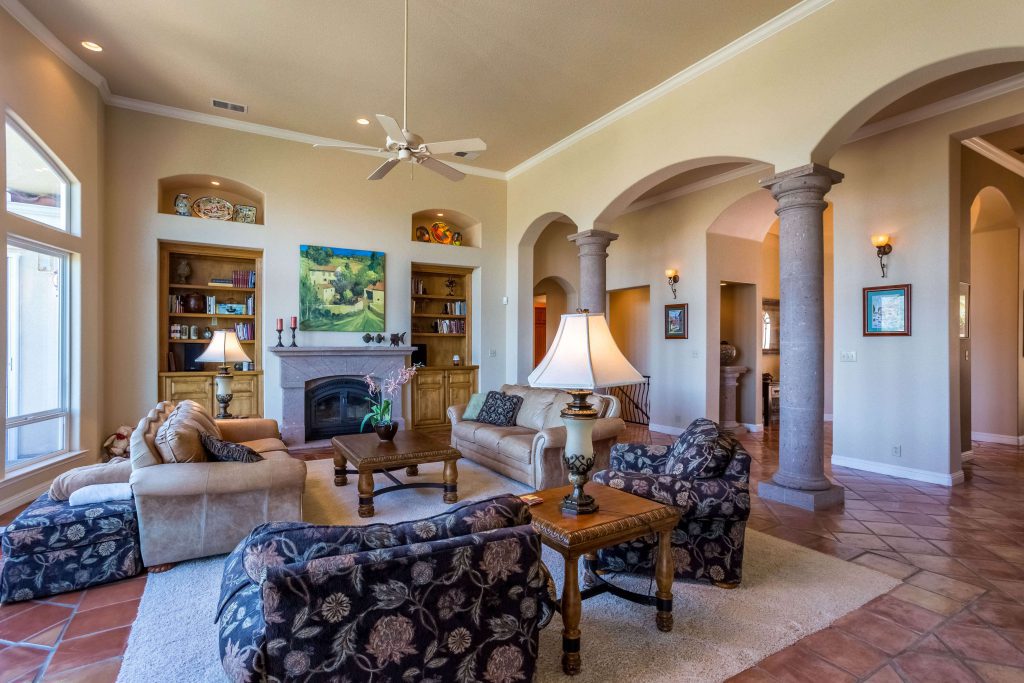
Living Room
- Arrange furniture to create an open, inviting layout.
- Add decorative pillows and throws for warmth.
- Remove remote controls, magazines, and personal clutter.
Kitchen
- Wipe down all appliances and countertops.
- Remove fridge magnets and excess decor.
- Place a bowl of fresh fruit or a small vase with flowers for a pop of color.
Bedrooms
- Make the bed with fresh linens and plump pillows.
- Clear nightstands of clutter and keep decor minimal.
- Store personal items like jewelry and chargers out of sight.
Bathrooms
- Clear countertops and store personal hygiene products.
- Hang fresh, neatly folded towels.
- Replace worn shower curtains and rugs.
Exterior Preparation
1. Boost Curb Appeal
The exterior of your home is the first thing buyers will see. Make sure it shines:
- Mow the lawn and trim bushes.
- Remove weeds and dead plants from flower beds.
- Add fresh mulch for a polished look.
- Sweep walkways and driveways.
- Ensure exterior lighting is working properly.
2. Prepare Outdoor Spaces
A well-maintained outdoor area can add value to your home listing:
- Arrange patio furniture neatly.
- Remove clutter like toys, hoses, and trash bins.
- Clean outdoor grills and kitchen areas.
Final Touches Before the Photoshoot
1. Eliminate Distractions
- Turn off TVs, ceiling fans, and computer screens to prevent visual noise.
- Remove pet bowls, beds, and litter boxes.
- Ensure children’s toys and belongings are stored away.
2. Add Small Decorative Touches
- Place a few fresh flowers or green plants in key areas.
- Light scented candles before the shoot to create a fresh atmosphere.
- Arrange throw blankets or decorative pillows for a cozy touch.
Additional Tips for a Successful Photoshoot
| Tip | Description |
|---|---|
| Schedule Photos in the Morning | Natural light is best during early hours. |
| Use a Professional Photographer | High-quality images boost interest. |
| Take Test Photos | Check how rooms look before the actual shoot. |
| Keep It Simple | Avoid over-decorating or excessive staging. |
FAQs About Preparing for Real Estate Photos
How long does it take to prepare a home for real estate photos?
It depends on the home’s condition, but most houses can be prepped in 1-3 days.
Should I hire a professional cleaner before the photoshoot?
Yes! A professional cleaning service ensures your home looks spotless in pictures.
Can I take real estate photos with my phone?
While smartphones have good cameras, a professional photographer will capture the best lighting and angles.
Do I need to repaint my home before real estate photos?
Not necessarily, but touching up scuffed or faded walls can improve the overall appearance.
What colors work best for staging real estate photos?
Neutral tones like white, beige, and light gray make spaces feel open and inviting.
Wrapping Up: Make Your Home Shine in Photos
Preparing your house for real estate photos can make all the difference in attracting potential buyers. A clean, well-lit, and thoughtfully staged home stands out in listings, increasing interest and leading to quicker offers. By following these steps, you ensure your home makes a lasting impression and appeals to buyers from the very first glance.
Selling your home in Fresno or Clovis? Make a lasting first impression with professional real estate photography from Focus Photo! We specialize in high-quality, eye-catching images that highlight your property’s best features, helping you attract more buyers and sell faster.
Don’t settle for average photos—showcase your home at its best! Contact us today to book your session.